

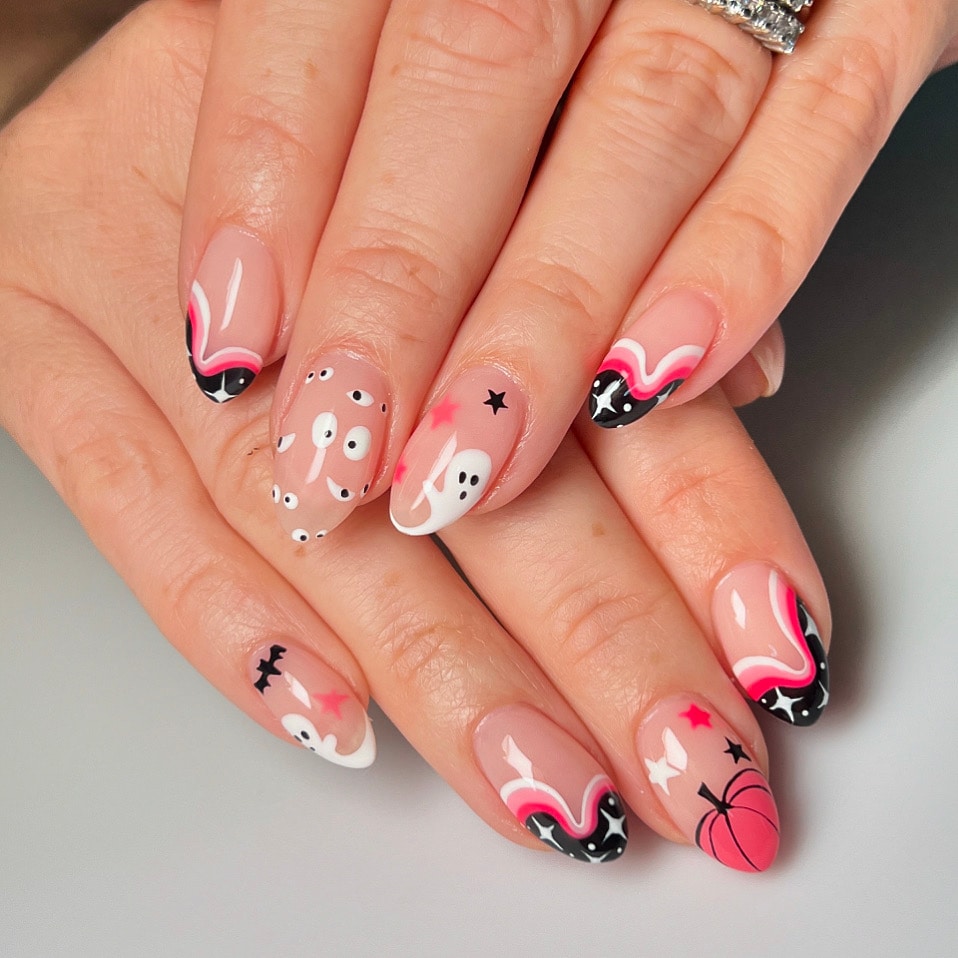
From moody magnetic finishes and tiny eyeballs to glow-in-the-dark skeletons and intricate hand-painted designs, there's more than one way to get into the Halloween spirit.
Halloween is the one time of year when more really is more, especially when it comes to your nails. A little extra glitter? Absolutely. Glow-in-the-dark details? Even better. A tiny spider crawling across your French tip? Definitely. But not every Halloween manicure needs an arsenal of nail art brushes or hours of painstaking detail. Some of the best looks start with an unexpected color combination, a clever use of texture or just a few well-placed dots.
Whether you're keeping things minimal or going all out with the artistry, we've rounded up some Halloween nail ideas for every skill level, from beginner-friendly designs to the kind of mini masterpieces that require a closer look.
Easy Halloween Nails: Maximum Impact, Minimum Effort
No steady hand required. These designs let color, special effects and a few simple tools do most of the work.
1. The Halloween Skittles Manicure
Sometimes the color palette is the nail art.
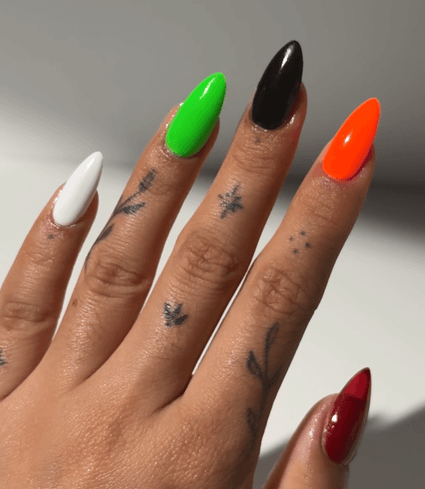
Take the skittles manicure—where every nail gets a different shade—and give it a Halloween twist. Think: inky black, pumpkin orange, electric green and deep purple. Mix glossy finishes with a little shimmer, or alternate brights and darks for extra contrast.
Get the look: Grab Mia Secret's Haunted Eve Collection and paint each nail a different color. Keep the finish consistent for a polished look, or experiment with a matte top coat for a moodier effect.
2. Dark Magic: Layered Cat Eye
Consider this your shortcut to a seriously dimensional manicure.
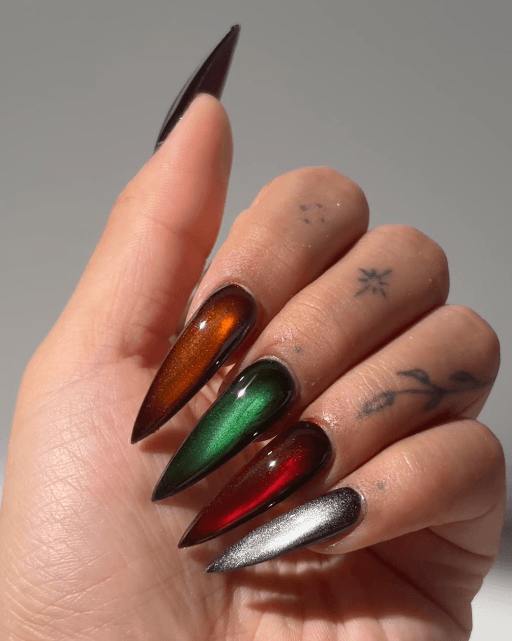
Start with a cat eye gel (the darker the better), then layer a translucent glaze over it. The magnetic shimmer underneath creates depth and movement, while the glaze adds a veil of color that shifts with the light.
Try Jade for an eerie green glow, Sunstone for fiery orange or Ruby for a deep, vampy finish, all from the Horror Nights collection.
Get the look: Apply and cure black Eclipse Cat Eye gel from the Horror Nights Collection, using a magnet to create your desired effect before curing. Layer a translucent Glaze Gel over the cured cat eye, then cure according to product directions and finish with Glass Finish Gel.
3. I've Got My Eyes on You
Sometimes two dots are all you need.
Tiny eyeballs turn just about any manicure into something a little more playful. Add them to a solid black base for a graphic look, scatter them across a neon shade or use them as unexpected accents on a French manicure.
Get the look: Using the larger end of a dotting tool, place small white dots on your cured base color. Cure as needed, then use the smaller end of the dotting tool to add black pupils. Position them in different directions for a slightly mischievous effect. Cure and seal with top coat.
Medium Halloween Nail Art: A Little More Detail, A Lot More Personality
Ready to put your nail art skills to work? These designs require a bit more control, but they're still surprisingly approachable.
4. The Friendly Ghost
A little glitter, a little shimmer and you get a ghost that's more charming than chilling.
This design starts with a sparkling base and adds a flowing white shape that resembles a tiny ghost floating across the nail. It's playful without being overly literal, making it a great option for anyone who prefers a softer Halloween manicure.
Get the look: Apply your favorite full-coverage glitter gel and cure. Using Snow White Gel Paint and a detail brush, create an elongated teardrop or curved swoop along the base or free edge of the nail. Add two small black dots for eyes, curing between steps, and finish with top coat.
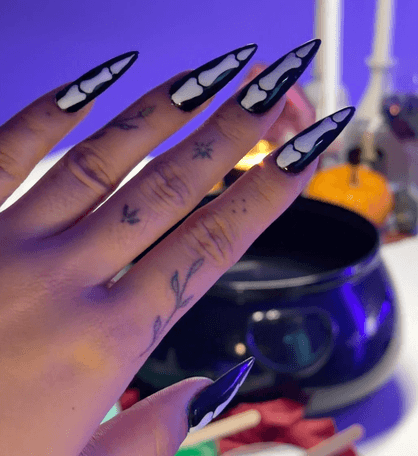
5. Glow-in-the-Dark Skeletons
A classic black-and-white manicure with a surprise after dark.
Delicate skeletal bones painted along the length of an elongated almond or stiletto nail create a graphic, almost anatomical effect. But the real fun begins when the lights go out.
Get the look: Start with a Black Gelux as the base color, wiping off the tacky layer with cleanser or isopropyl alcohol after curing. Use a detail brush to hand-paint bones with White Gelux along the nail, leaving enough negative space between the shapes to make the design recognizable. While the White gel layer is still tacky, sprinkle Glow-in-the-Dark Nail Art Powder onto it, then cure. Brush off any remaining powder, and seal as directed with UV Finish Gel.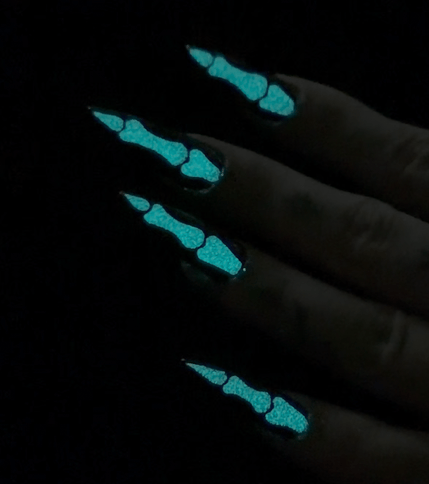
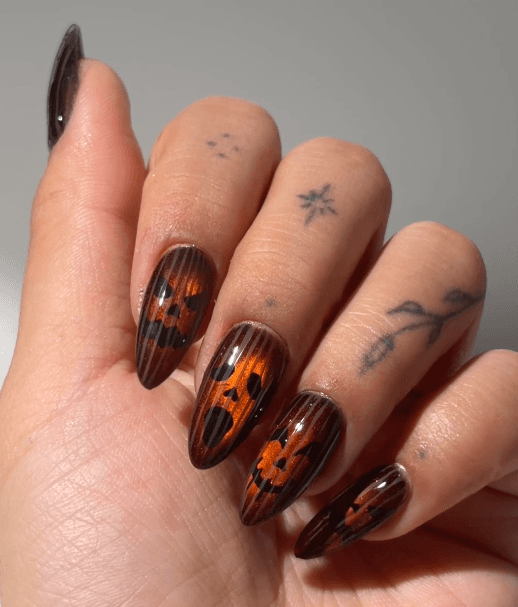
Jack-o'-lanterns, but make them dimensional.
This look plays with magnetic cat eye, a translucent orange glaze and the contrast between matte and glossy finishes. Each nail gets its own jack-o'-lantern expression, while subtle glossy lines create the illusion of a pumpkin's rounded surface.
Get the look: Start with Eclipse Cat Eye Gel and use your magnet to concentrate the metal particles at the center of the nail. Cure, then apply a thin coat of Sunstone Glaze Gel for a glowing orange finish. Once cured, hand-paint a different jack-o'-lantern face on each nail using black gel paint and cure. Apply matte top coat and cure, then use a liner brush to paint thin, lines with high-shine, no-wipe Finish Gel. Cure again to reveal a subtle tone-on-tone texture.
Advanced Halloween Nail Art: The Devil's in the Details
For nail artists who love a challenge, Halloween is the perfect excuse to show off those hand-painting skills. Think tiny details, intricate line work and designs that make people stop and ask, "Wait, that's hand-painted?”
7. A Beautiful Mind
Who knew brains could make such interesting nail art?
Swirling, dimensional-looking folds in shades of pink and red create an unexpectedly graphic design. Keep the palette realistic for a creepy anatomical effect, or lean into brighter pinks for something a little more pop art.
Artist's tip: Build the brain pattern with thin, curved lines, varying their spacing and direction to mimic natural folds. Add deeper pink or red shadows and lighter highlights to give the design dimension.
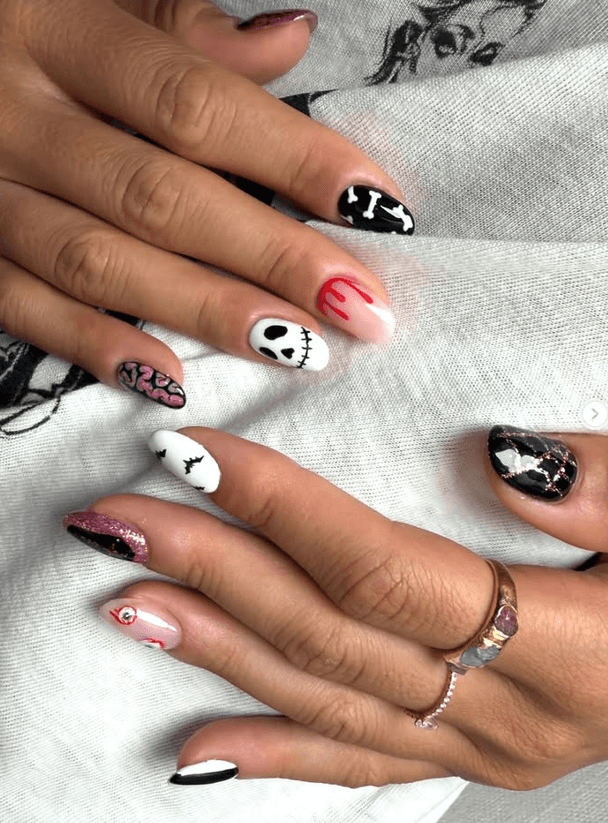 Image courtesy of @kimkimnails
8. Love at First Bite
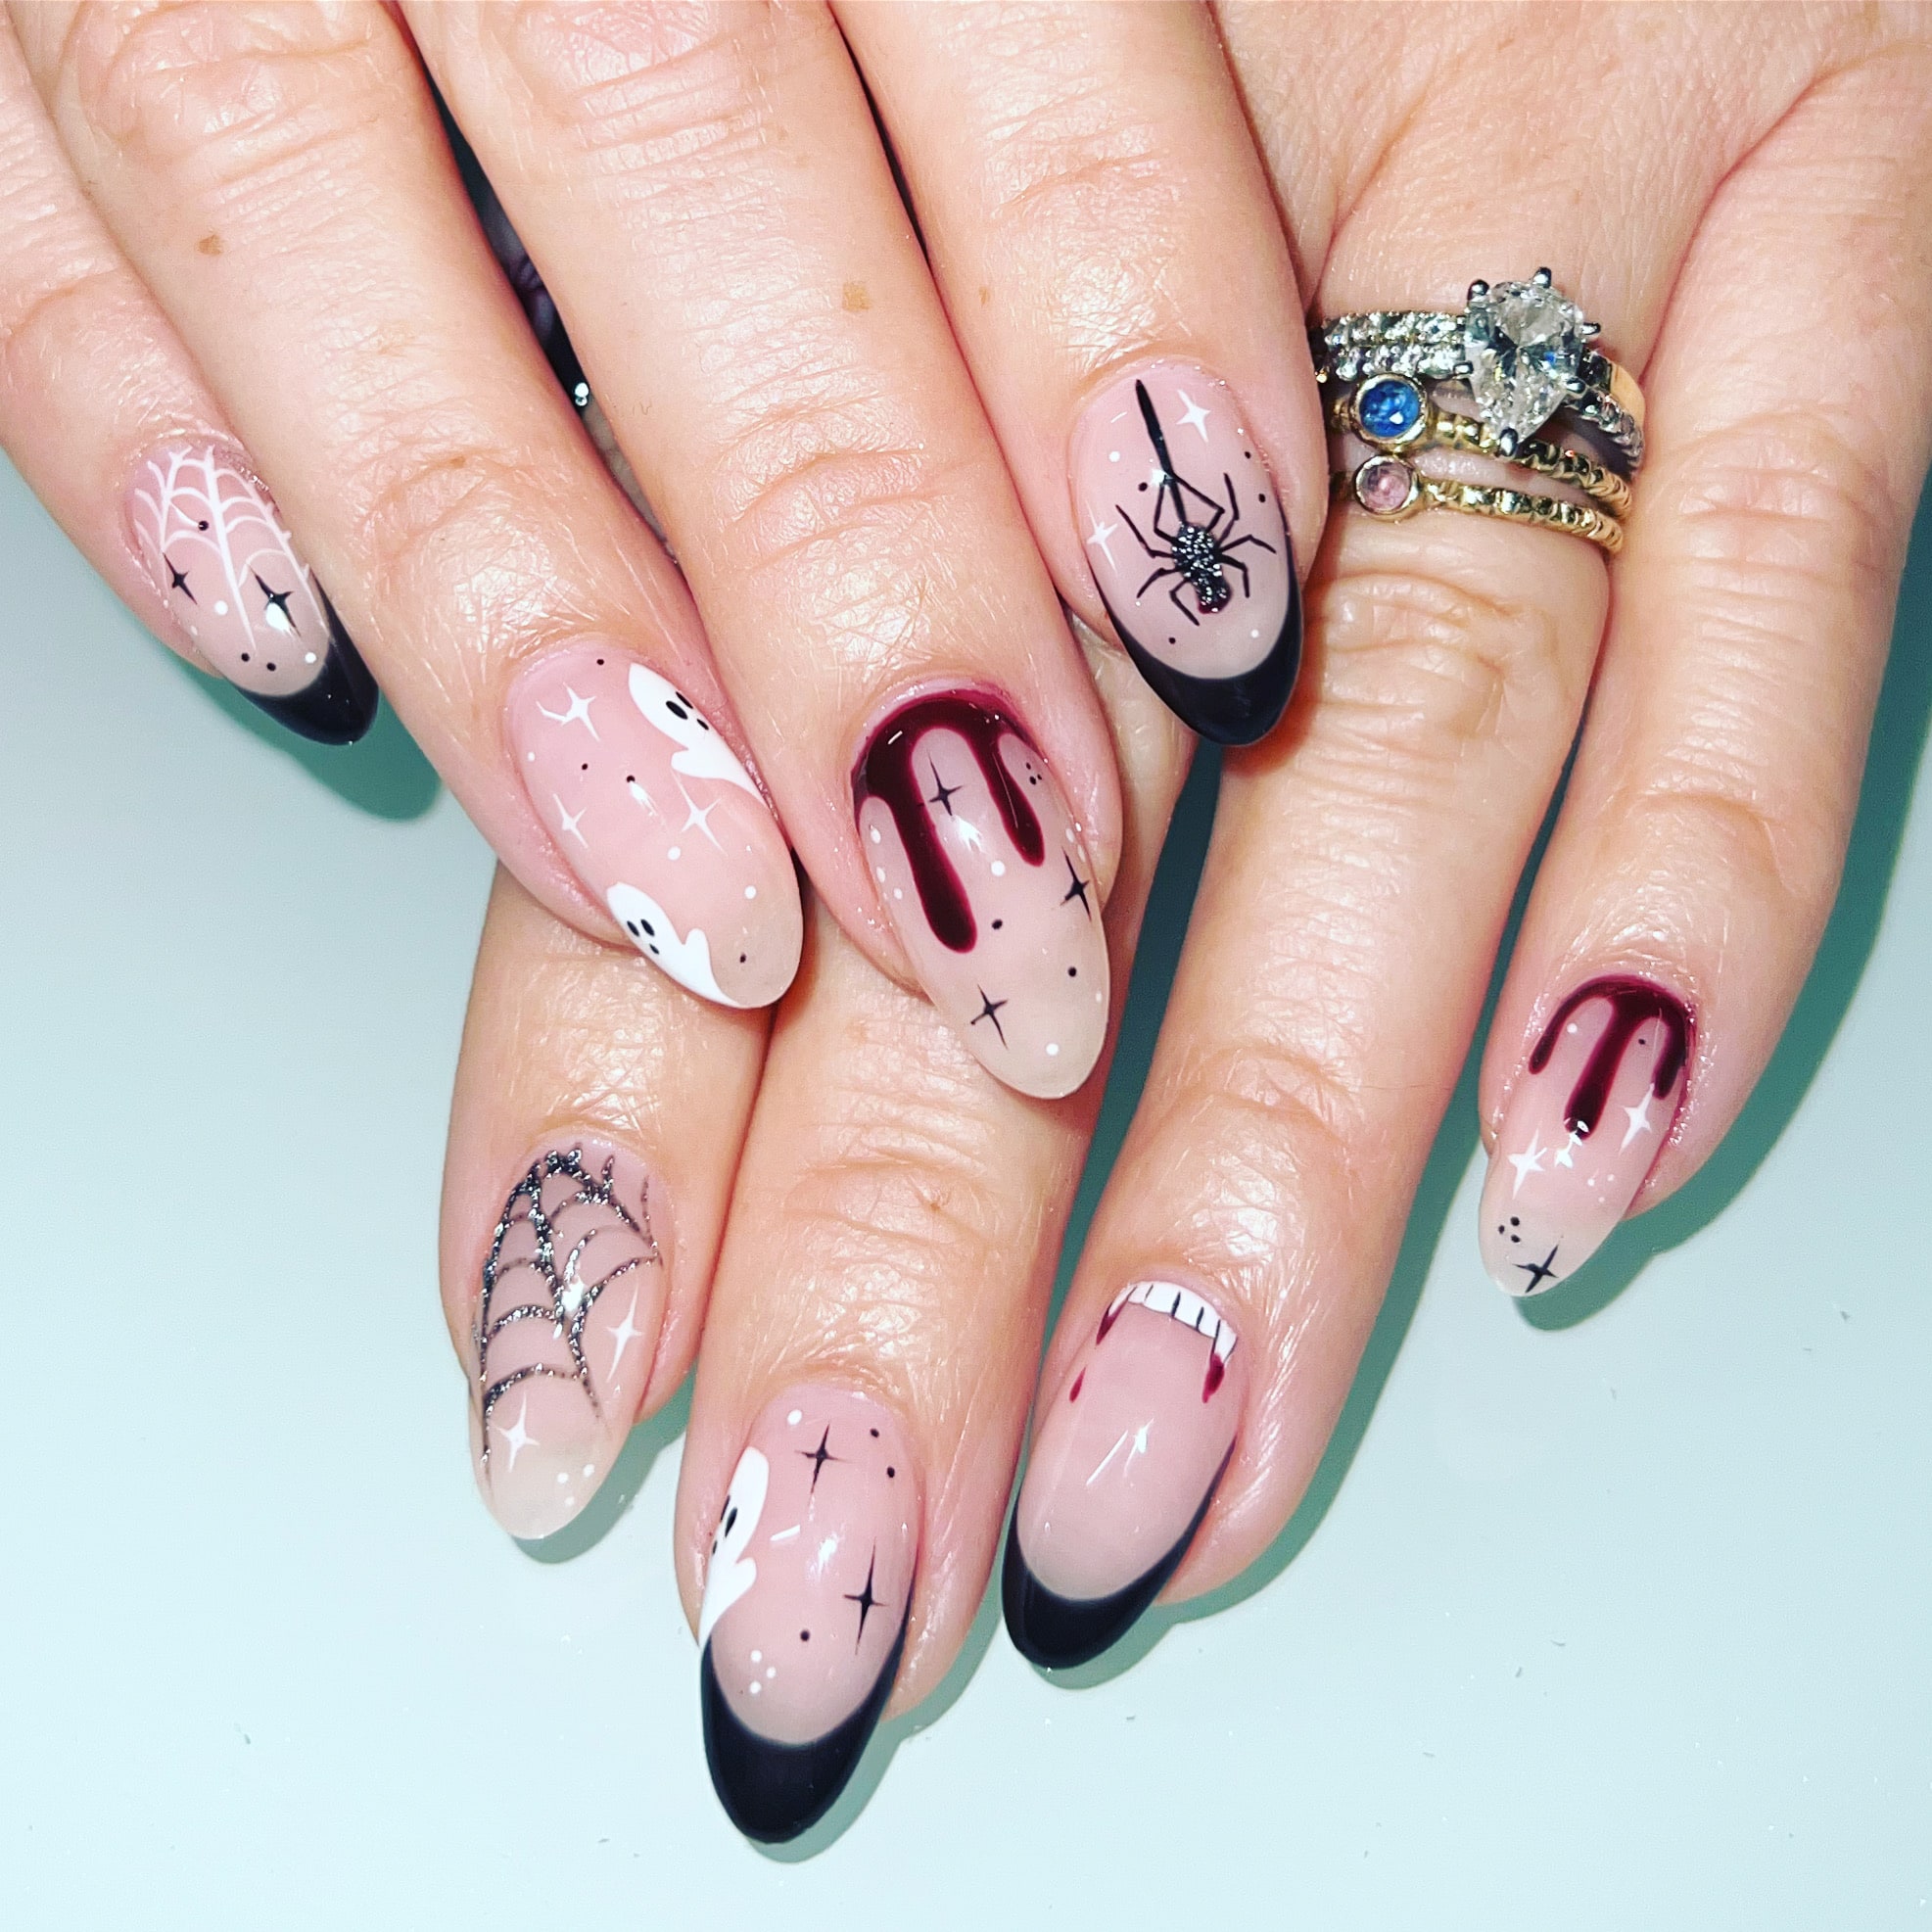
Vampire-inspired nails can go in several directions, from sharp white fangs against a dark base to tiny droplets of blood suspended from the free edge.
For a more dramatic take, pair the design with Crimson Jam, the rich, dark red from Mia Secret's Horror Nights Collection.
Artist's tip: Use a fine liner brush to create tapered fang shapes, then build the surrounding shadows for depth. A small touch of glossy red gel adds that freshly bitten effect.
9. Caught in a Web
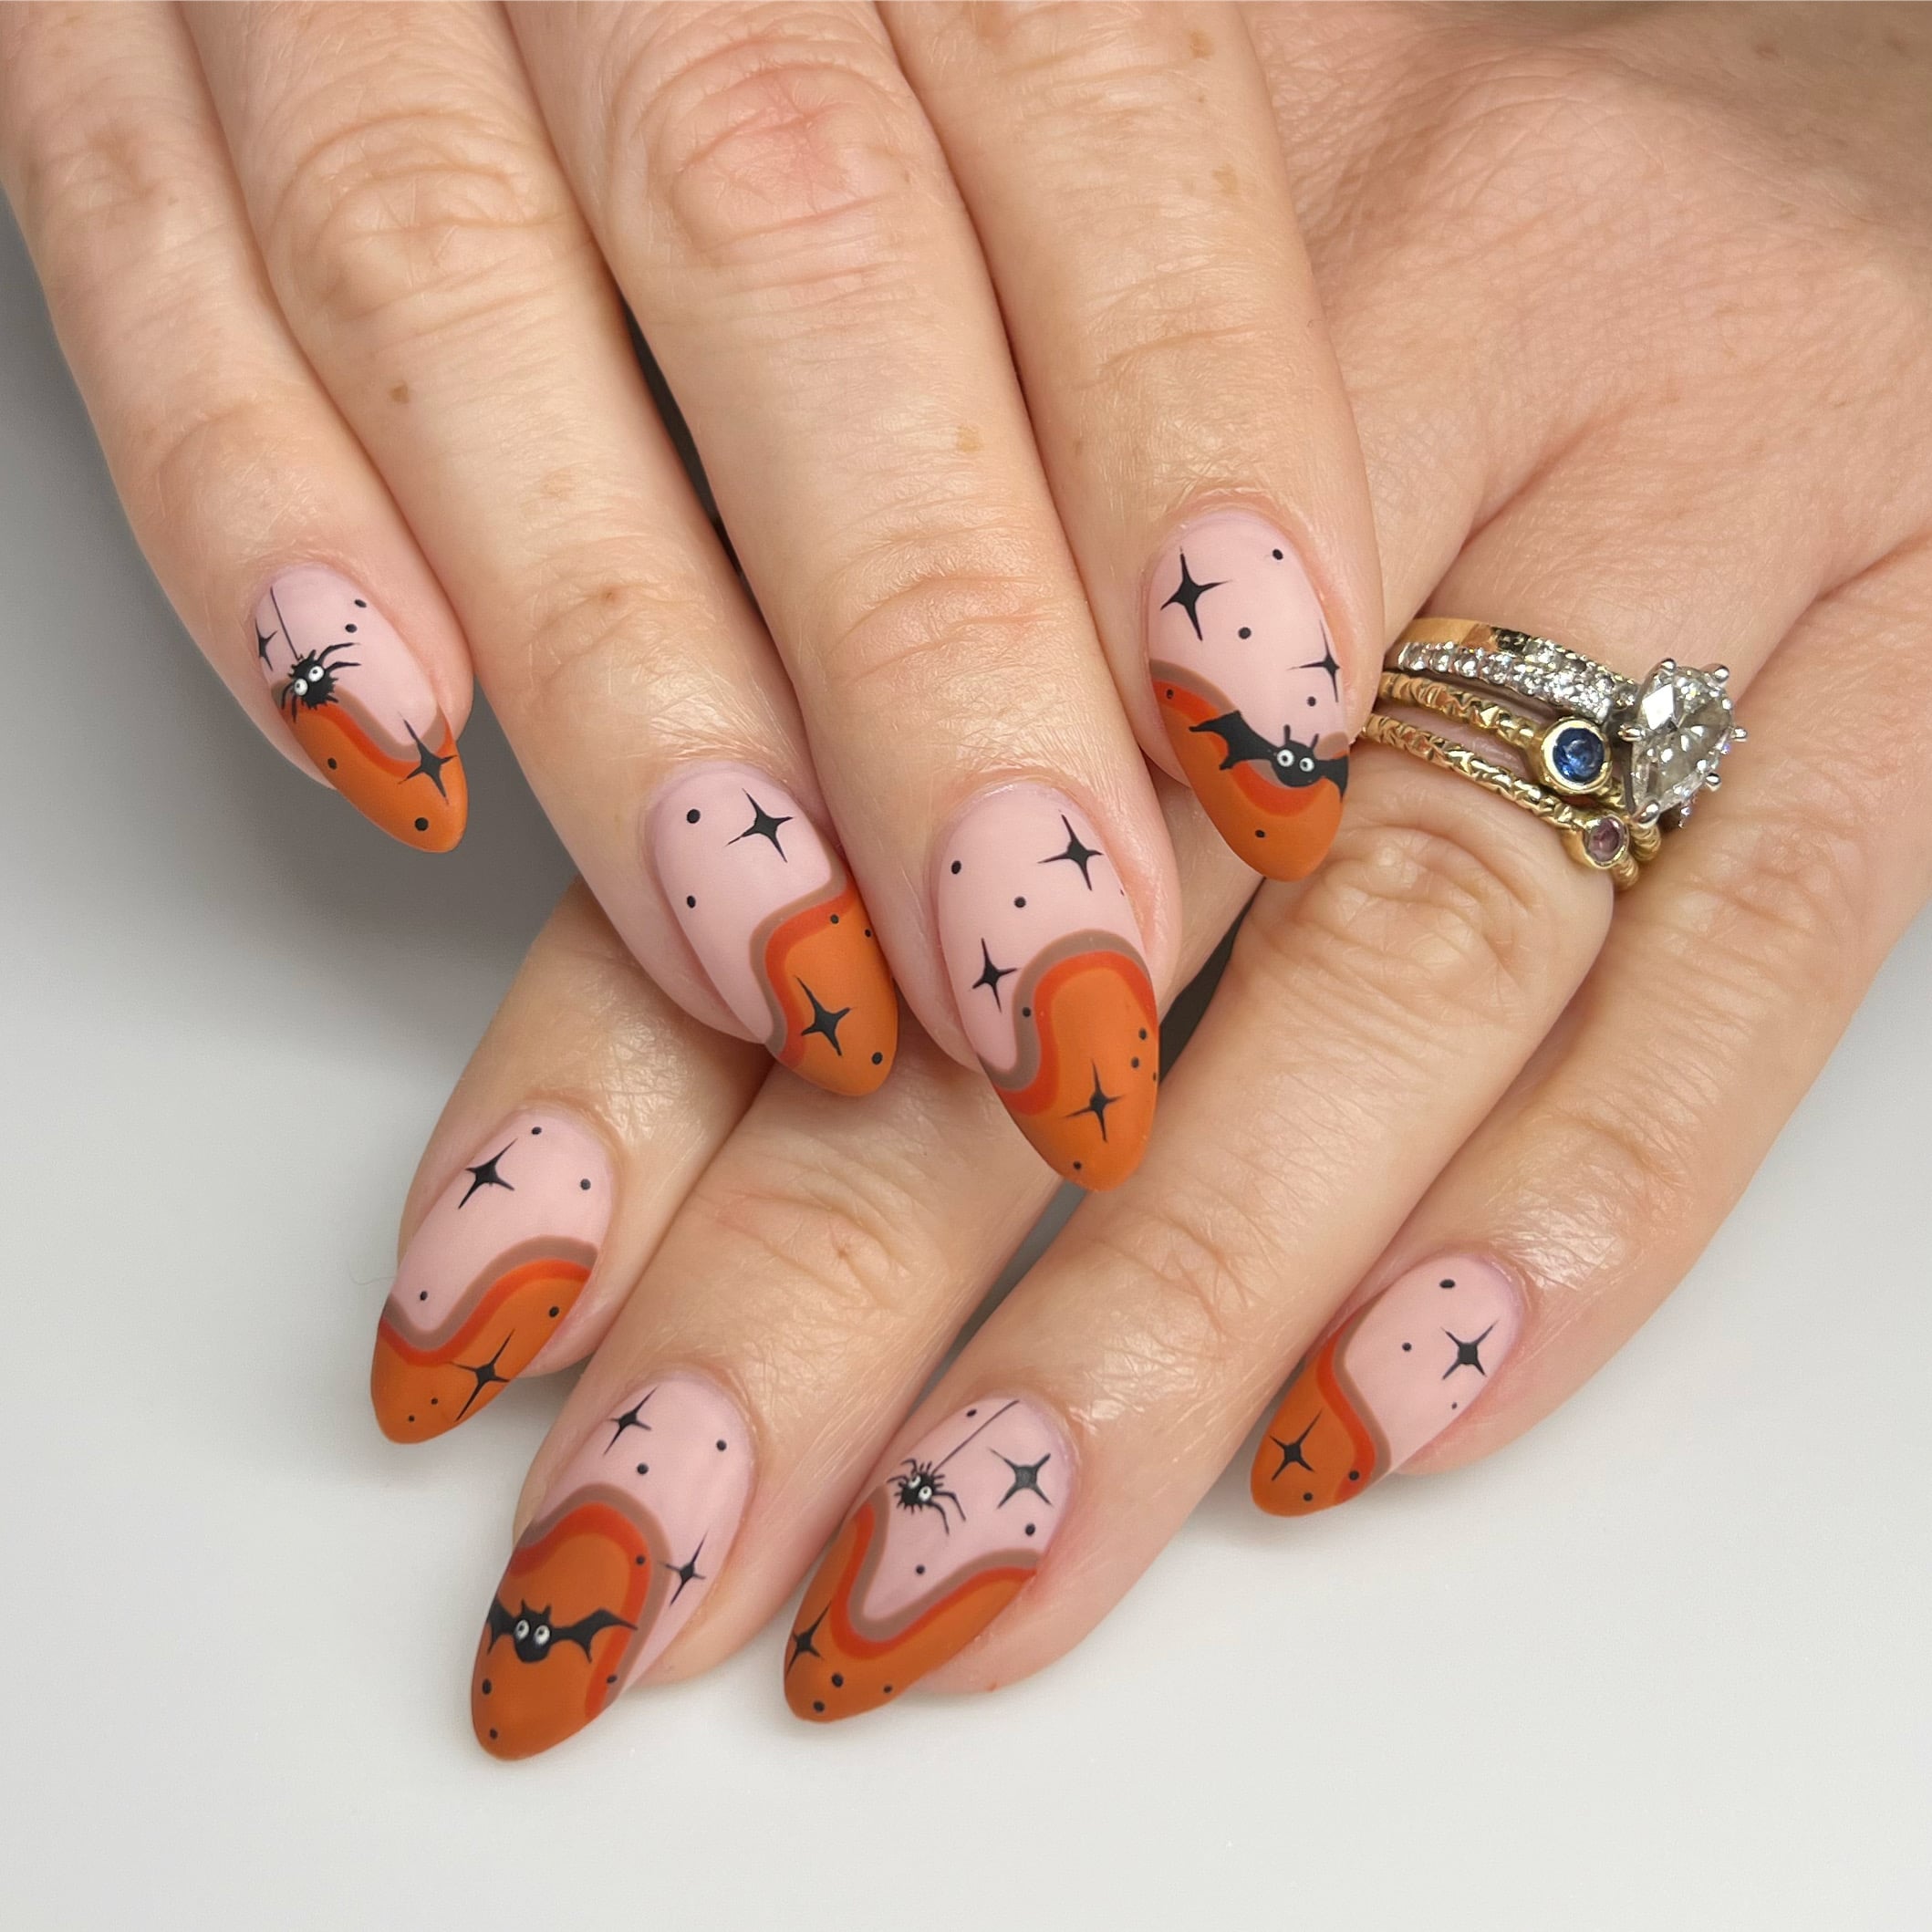
There's something particularly striking about a tiny spider against an otherwise understated manicure.
Paint delicate legs with a fine liner brush, then build the body using small dots of gel paint. For a more glamorous take, add a touch of glitter to the body or place the spider over a shimmering cat eye background.
Artist's tip: Start with the body before adding the legs. Use fine, tapered strokes and vary the leg angles to give the spider a more natural silhouette.
Your Halloween Nail Art Kit
The best Halloween nail designs aren't necessarily the most complicated; they’re the ones that make the most of the colors, finishes and tools you already have.
For bold, classic Halloween color, reach for the Haunted Eve Collection, with its moody shades and attention-grabbing neon green and orange. For a more experimental approach, the Horror Nights Collection brings special effects into the mix, from the magnetic depth of Eclipse cat eye gel to the translucent color of Jade, Sunstone and Ruby Glaze Gels, plus the rich red of Crimson Jam.
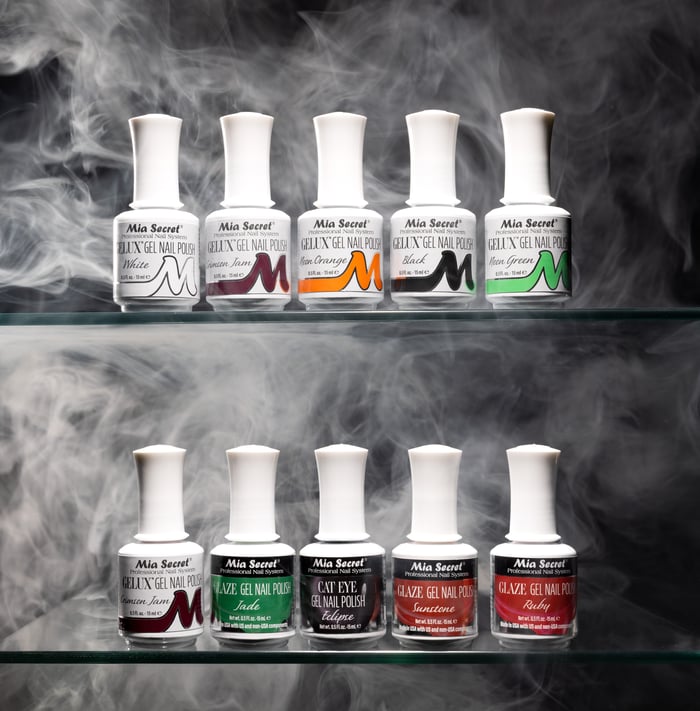
Add a few essentials—a liner brush, dotting tool, cat eye magnet and your favorite matte and glossy top coats—and you've got everything you need to create your own Halloween nail ideas from subtle to seriously spooky.
And remember, Halloween is the perfect time to experiment—mix your finishes, layer your colors, try a design that's a little outside your comfort zone—because if there's ever a time to get a little creative with your nails, this is it!